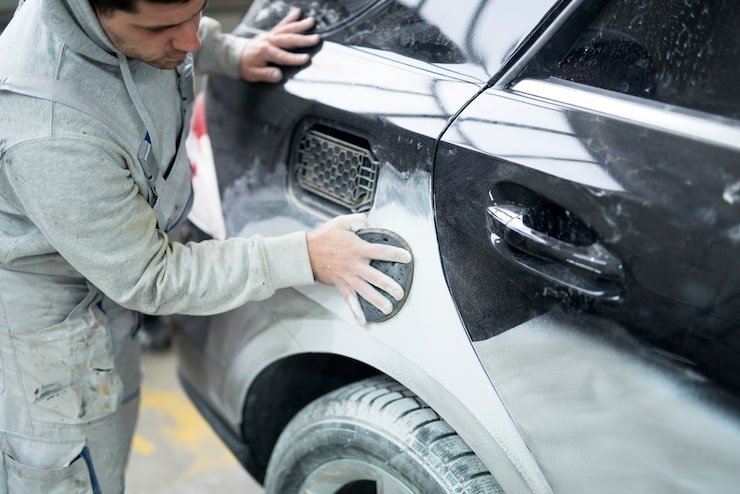
Best Car Touch Up Paint: Complete Guide for Scratches and Chips
Finding the best car touch up paint can make a major difference when you want to repair small scratches, stone chips, scuffs, and exposed spots without repainting an entire body panel. A quality touch-up product can improve the appearance of minor damage while helping protect exposed surfaces from moisture and corrosion. However, choosing the right product involves more than simply selecting a color that looks similar to your vehicle. Paint code, damage type, application method, finish, and preparation all affect the final result.
Small paint imperfections are common on everyday vehicles. Road debris can create chips on the hood, shopping carts can leave marks on doors, and minor parking incidents can damage bumpers or fenders. Fortunately, many small imperfections can be addressed at home when the damage is suitable for touch-up repair.
What Is Car Touch Up Paint?
Car touch-up paint is automotive paint designed for repairing small areas of damaged factory paint. It is generally available in several forms, including pens, small bottles with brushes, aerosol cans, and complete repair kits.
Unlike a full vehicle repaint, touch-up paint is intended for localized repairs. It allows you to apply a small amount of matching color directly to the damaged area rather than covering an entire panel.
A typical repair may involve several layers:
- Cleaning and preparing the damaged surface
- Applying primer when necessary
- Applying the matching color coat
- Adding clear coat when required
- Allowing the repair to dry and cure
- Carefully leveling or polishing the area when appropriate
The exact process depends on the type of paint system used by the vehicle and the depth of the damage.
Why Choosing the Correct Paint Code Matters
One of the most important steps in any touch-up repair is identifying the vehicle’s original paint code. A general color description such as black, white, red, silver, or blue is usually not precise enough.
Automakers often offer multiple shades that look similar but have different formulas. Two vehicles that appear to have the same basic color may require completely different paint.
The paint code can often be found on an identification label or plate located in areas such as:
- Driver-side door jamb
- Door frame
- Under the hood
- Engine compartment
- Trunk area
- Glove compartment
- Vehicle identification documentation
The exact location varies by manufacturer and model.
If you cannot locate the code, a dealership, professional paint supplier, or automotive parts specialist may be able to help identify the correct formulation using vehicle information.
Types of Touch Up Paint
Different repair situations require different application methods. Choosing the right format can make the job significantly easier.
Paint Pens
Paint pens are convenient for tiny scratches, narrow chips, and small marks. Their pointed applicators provide better control than a standard brush for very small areas.
They are particularly useful when:
- The damaged area is tiny
- You need precise application
- You are repairing several small chips
- You want a portable repair solution
However, applying too much paint with a pen can create raised spots that are more noticeable than the original damage.
Brush Bottles
Small bottles with integrated brushes are useful for chips and slightly larger areas. They provide more paint than many pens and can be easier to control when filling a small depression.
A fine artist-style brush can sometimes provide even greater control, particularly for experienced users.
Aerosol Touch-Up Paint
Spray paint is better suited to larger areas or repairs where blending is necessary. It requires more preparation and greater attention to overspray.
Aerosol applications can be appropriate for:
- Larger scratches
- Small panel repairs
- Bumper areas
- Multiple nearby imperfections
Because spray paint covers a wider area, masking and surface preparation become especially important.
Complete Repair Kits
Some kits combine primer, color paint, clear coat, applicators, and preparation materials. These can be convenient for beginners because the necessary components are packaged together.
A complete kit can be particularly useful when the damage extends beyond the surface color and exposes primer, metal, or another underlying layer.
Matching the Paint to the Type of Damage
Before buying paint, inspect the damage carefully. Not every scratch requires touch-up paint.
A very shallow scratch that affects only the clear coat may respond better to polishing or a suitable scratch-removal compound. Painting such a mark may actually make the repair more visible.
If the scratch has removed the color layer, touch-up paint may be appropriate. If bare metal is visible, the repair may require additional preparation and primer.
| Damage Type | Possible Solution | Difficulty |
|---|---|---|
| Very light surface mark | Cleaning or polishing | Easy |
| Small color-coat chip | Touch-up paint | Easy |
| Small chip exposing metal | Primer, color, and clear coat | Moderate |
| Deep scratch | Multi-step repair | Moderate to difficult |
| Large damaged panel | Professional refinishing | Difficult |
| Dent with paint damage | Body repair and refinishing | Professional |
Understanding the depth of the damage prevents you from using the wrong product.
What Makes a Good Touch-Up Paint?
Several factors should be considered when comparing automotive touch-up products.
Accurate Color Matching
Color accuracy is one of the most important characteristics. A product that does not match the original finish can make a small repair stand out.
Always prioritize paint-code matching over choosing a color based only on appearance.
Good Applicator
The applicator should suit the size of the repair. A fine tip works well for narrow scratches, while a small brush may be better for chips.
Durable Finish
Automotive paint must withstand outdoor conditions, including sunlight, rain, temperature changes, washing, and road contaminants. A suitable clear coat can provide additional protection and help reproduce the original gloss level.
Ease of Application
Beginners may benefit from products with clearly defined steps and dedicated applicators. More experienced users may prefer separate primer, paint, and clear-coat products for greater control.
Suitable Quantity
Buying too much paint for a tiny repair is unnecessary, but purchasing too little can make it difficult to complete the job properly. Consider the number and size of repairs before selecting the quantity.
How to Prepare a Car Before Touch-Up Painting
Preparation is often more important than the application itself. Dirt, wax, grease, and road contaminants can interfere with adhesion.
Start by thoroughly washing the affected area. Allow it to dry completely before continuing.
Inspect the damage and remove loose particles or flaking paint carefully. If rust is visible, it should be addressed before applying new paint. Painting directly over active rust can lead to further problems beneath the repair.
For deeper damage, the edges may need careful smoothing. Avoid unnecessarily enlarging the damaged area.
Before painting, make sure:
- The surface is clean
- The area is completely dry
- Loose paint has been removed
- Rust has been addressed
- Wax and grease have been removed
- The surrounding surface is protected
- Weather conditions are appropriate
Working in a clean, dry, well-ventilated location can make the process easier.
Step-by-Step Application Guide
Once the correct paint and preparation materials are ready, application should be done carefully.
Step 1: Clean the Area
Wash the vehicle and concentrate on the damaged section. Remove dirt and road debris completely.
Step 2: Inspect the Scratch
Determine whether the damage affects only the clear coat, the color layer, or deeper layers.
Step 3: Apply Primer When Needed
If bare metal or another substrate is exposed, an appropriate automotive primer may be required. Apply a thin layer and allow it to dry according to the product instructions.
Step 4: Apply the Color
Shake or mix the paint according to the manufacturer’s directions. Apply a very small amount rather than trying to fill the entire area with one thick coat.
Several thin applications can produce a cleaner result than one heavy layer.
Step 5: Allow Proper Drying Time
Do not immediately touch, wash, sand, or polish the repair. Paint may feel dry on the surface before it has fully cured.
Step 6: Apply Clear Coat
If the vehicle uses a basecoat-and-clearcoat system, a compatible clear coat can provide gloss and additional protection.
Step 7: Allow the Repair to Cure
Patience is essential. Rushing the finishing process can damage the new paint or create an uneven appearance.
Common Mistakes to Avoid
Many disappointing touch-up repairs are caused by application errors rather than poor-quality paint.
One common mistake is selecting paint based only on the vehicle’s color name. The exact paint code is much more useful for achieving a close match.
Another problem is applying too much paint at once. Thick applications can create raised blobs, runs, uneven texture, or long drying times.
Failing to clean the surface is another frequent issue. Oil, wax, dust, and moisture can prevent proper adhesion.
Some people also try to repair large areas with a tiny touch-up pen. Touch-up products are intended primarily for localized damage. Large scratches, dents, peeling paint, and extensive corrosion may require professional refinishing.
Touch-Up Paint vs Professional Repair
Touch-up paint is an excellent option for small cosmetic imperfections, but it cannot replace professional bodywork in every situation.
DIY repair is generally more appropriate when:
- The damaged area is small
- There is no major dent
- The surrounding paint is intact
- You are comfortable performing careful preparation
- A perfect factory-level finish is not required
Professional repair may be better when:
- A large panel is damaged
- The paint is extensively peeling
- There is significant rust
- The panel is dented
- The scratch is very deep
- Multiple layers of paint are damaged
- The repair is highly visible and a near-perfect finish is required
A professional refinisher can blend paint across a larger area and use specialized equipment to achieve a more uniform result.
How to Make a Touch-Up Repair Less Noticeable
The goal of touch-up painting is not simply to cover the damaged area. It is to make the repair blend naturally with the surrounding finish.
Use small amounts of paint and build the repair gradually. Avoid creating a thick mound above the surrounding surface.
For metallic and pearl finishes, application technique becomes particularly important because the appearance can change depending on how the particles are distributed.
Once the paint has properly cured, careful leveling and polishing may improve the appearance when the product and repair process allow it.
Good lighting is also helpful when inspecting the finished area. Examine the repair from different angles rather than judging it from one position.
How to Store Leftover Automotive Paint
If you have leftover paint after completing the repair, proper storage can help preserve it for future use.
Keep the container tightly sealed and follow the manufacturer’s storage recommendations. Store it in an appropriate location away from excessive heat, direct sunlight, and ignition sources.
Before using old touch-up paint again, inspect it for changes in consistency, separation, contamination, or other signs that it is no longer suitable.
Key Points to Remember
- Identify the vehicle’s exact paint code before purchasing paint.
- Choose an applicator based on the size and shape of the damage.
- Inspect the depth of the scratch before painting.
- Clean and dry the surface thoroughly.
- Treat exposed metal appropriately before applying color.
- Use thin layers instead of one heavy application.
- Allow adequate drying and curing time.
- Use compatible clear coat when required.
- Avoid using touch-up paint for large or severely damaged areas.
- Professional refinishing may be necessary for deep scratches, dents, or extensive corrosion.
How to Choose the Right Option for Your Repair
The ideal touch-up product depends on what you are trying to repair. A small stone chip may require only a precision applicator and color-matched paint. A deeper chip exposing metal may need primer, color, and clear coat.
If several small scratches are located across a panel, a larger bottle or aerosol system may be more practical. If the damage is extensive, professional refinishing could provide a better result than attempting multiple isolated touch-ups.
Think about the repair before choosing the product. The best solution is not necessarily the most expensive kit. It is the one that matches the paint system, damage type, application method, and desired finish.
Final Thoughts
Small scratches and chips do not always require an expensive body-shop visit. With the correct paint code, appropriate product format, careful preparation, and patient application, many minor imperfections can be improved at home.
The most important part of the process is matching the paint accurately. From there, surface preparation and thin, controlled applications can make a significant difference. Avoid rushing the drying and curing stages, and recognize when damage is too extensive for a simple touch-up.
For small cosmetic repairs, a carefully selected automotive touch-up product can be a practical way to improve the appearance of a vehicle and protect vulnerable areas. By understanding the type of damage and following the correct repair process, you can achieve a cleaner and more durable result.
FAQs
Can touch-up paint completely hide a car scratch?
It can significantly reduce the appearance of small scratches and chips, but it may not completely disappear. The final result depends on the depth, location, color, finish, and quality of application.
How do I find my car’s paint code?
The paint code is often printed on an identification label or plate. Common locations include the driver’s door jamb, door frame, engine compartment, trunk, or other manufacturer-specific areas.
Should I use primer before automotive touch-up paint?
Primer is generally useful when the damage exposes bare metal or another substrate that requires additional protection and adhesion. Minor surface-level damage may not require primer.
Is a paint pen better than a brush bottle?
Neither is universally better. A paint pen is convenient for narrow scratches and tiny chips, while a brush bottle can provide more flexibility for slightly larger repairs. The best choice depends on the size and shape of the damage.
When should I take a scratched car to a professional?
Professional repair is recommended for large scratches, deep damage, dents, extensive rust, peeling paint, or repairs where you require a highly seamless factory-style finish.



2 thoughts on “Best Car Touch Up Paint: Complete Guide for Scratches and Chips”